In this article, we will cover Installing Active Directory in Windows Server 2022. We will go through the step by step methods from installing Active Directory to promoting Domain Controller.
If you don’t have Windows Server 2022 ISO file, click here to download from the Microsoft’s official website.
What is Active Directory: Active Directory (AD) is Microsoft’s directory service where we can centralizes user, computer, network and resource information, enabling authentication, authorization, and access control. AD’s hierarchical structure includes domains, trees, and forests, with LDAP for data access. It offers Single Sign-On (SSO), enforcing policies through Group Policy. Active Directory integrates with services like Exchange and SharePoint. Organizational Units (OUs) enable granular management. AD is fundamental in enterprise networks, streamlining administration, bolstering security, and simplifying resource access across Windows-based environments.
Installing Active Directory on a Windows Server is a fundamental step in creating and managing a network environment using Microsoft’s directory service.
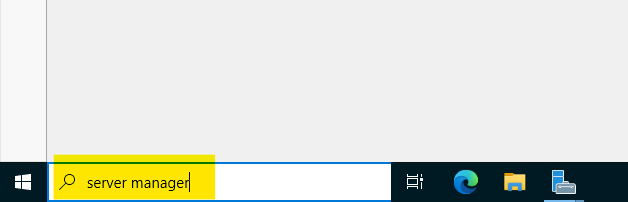
1. Login to Windows Server 2022 as an Administrator and search for Server Manager in the Windows Search bar located in bottom left corner. Once it shows, click on it to launch.
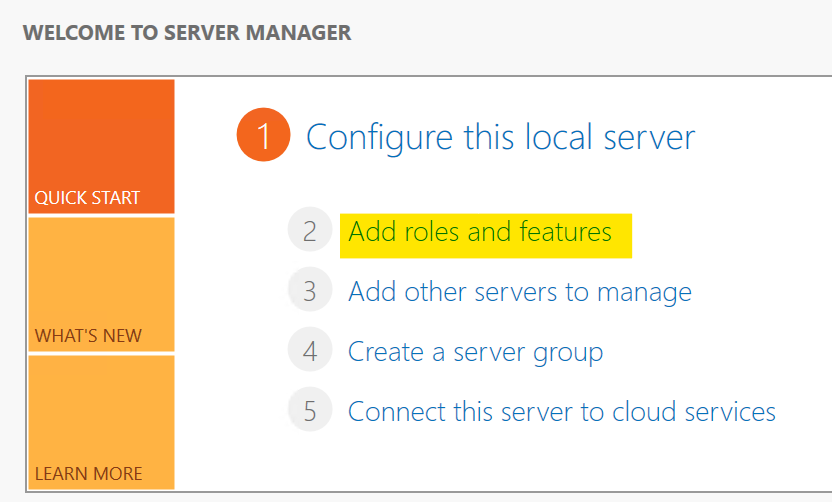
2. Now click on Add roles and features located in the middle of the screen to start the Active Directory and DNS server features.
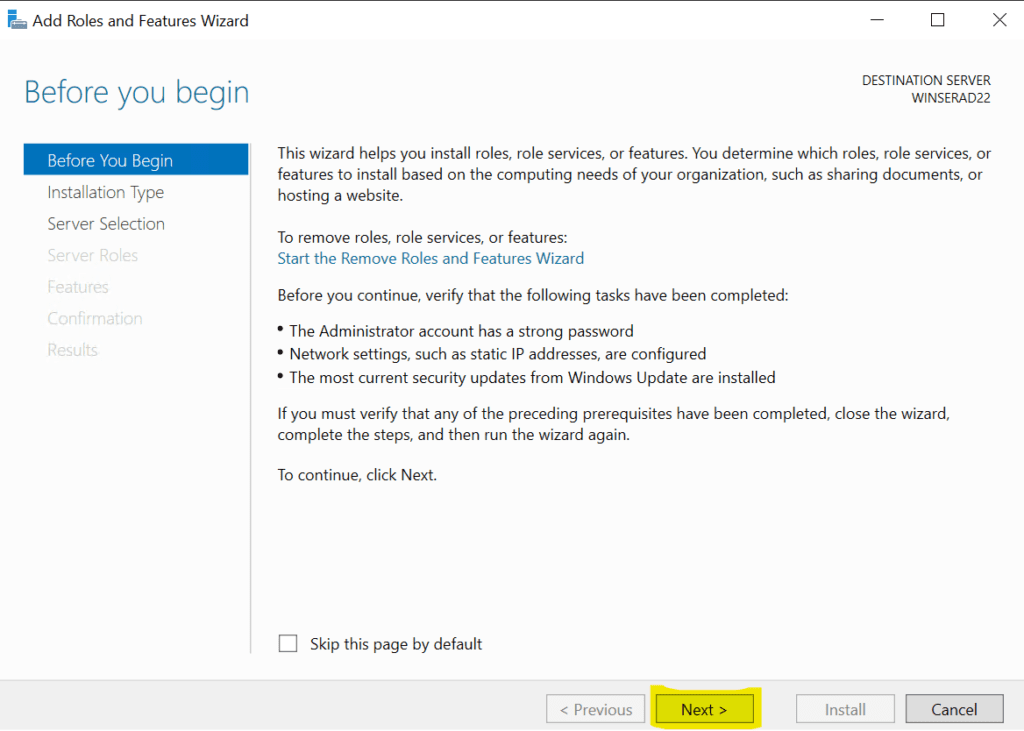
3. In the next page, click on Next button.
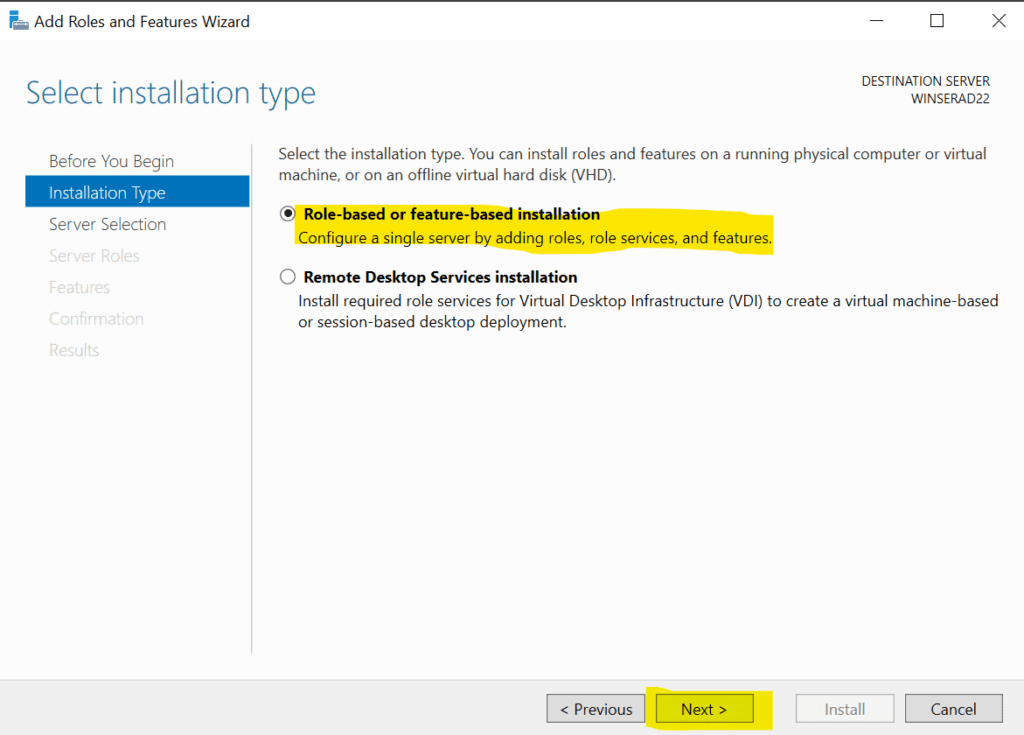
4. In the Installation type page, choose Role-based or feature-based installation and click on Next button.
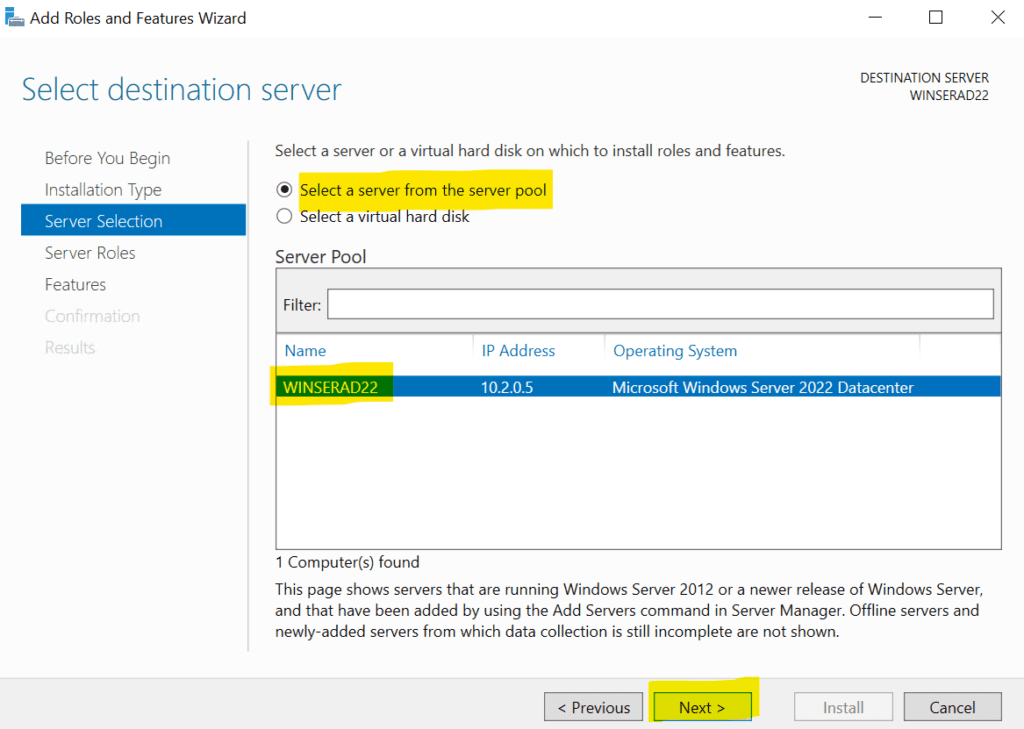
5. In the Server Selection page, choose Select a server from the server pool. Click on the server name listing there and click on Next button.
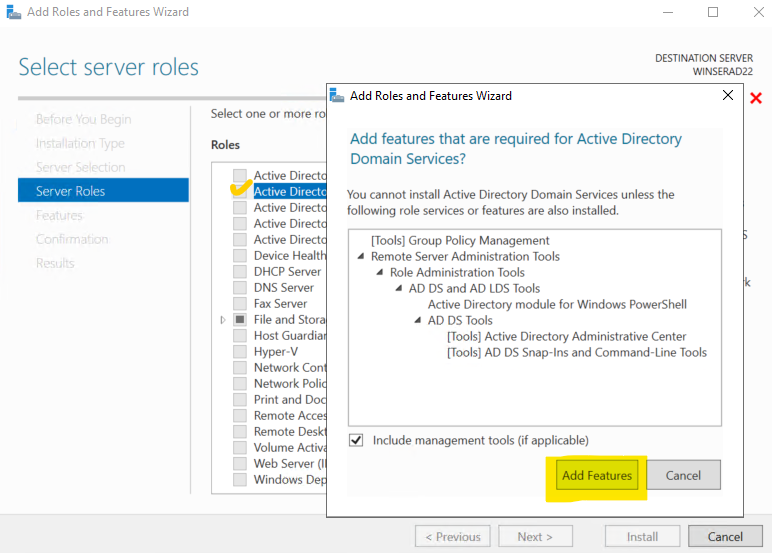
6. In the Server Roles page, check the box for Active Directory Domain Services. When you click on this, a pop-up windows will open where the required features would be showing which are going to install, click on Add Features to confirm this.
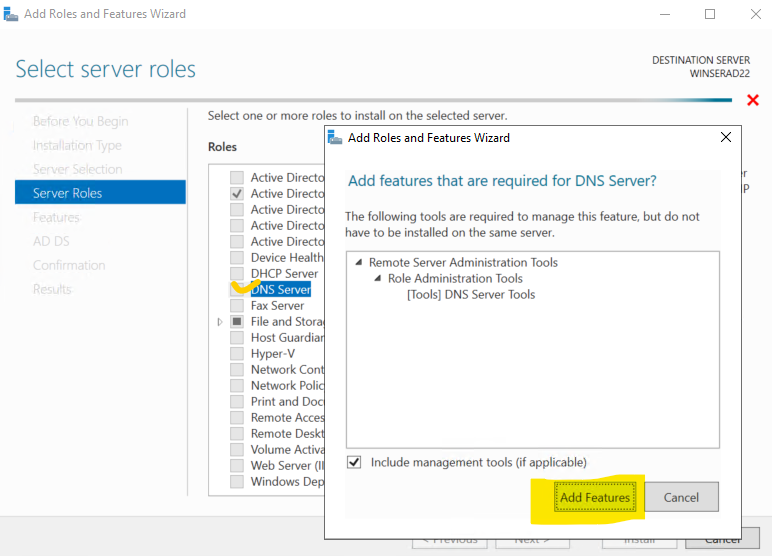
Also, click on DNS Server on the same page and click on Add Features button when pop-up.
Click on Continue button for Validation page.
When done, click on Next button to continue the installation process.
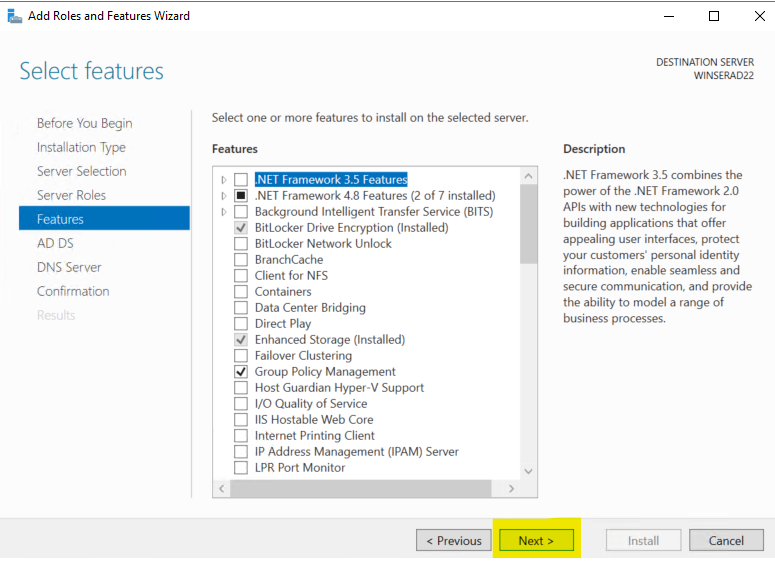
7. In the Features page, check the box if you required to install any of the available features and click on Next button.
8. Click on Next button on the AD DS and DNS Server page to continue to next steps.
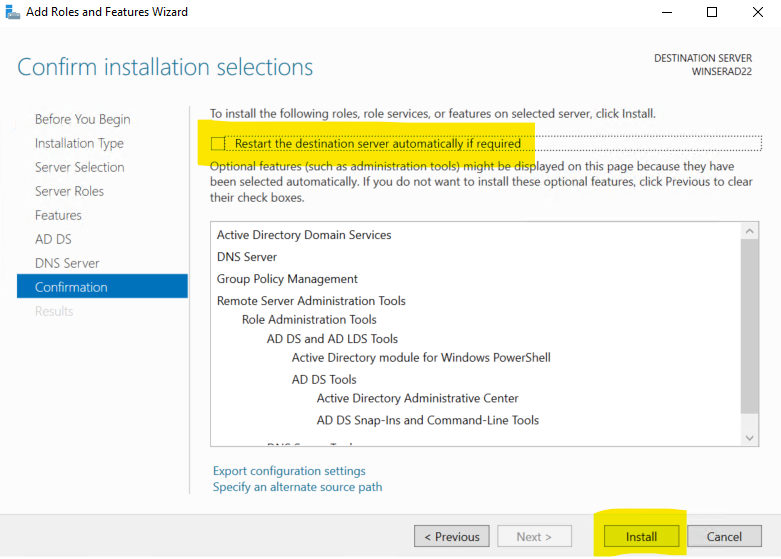
9. On the Confirmation page, don’t check the box for Restart the destination server automatically if required which means server will get restarted automatically once the installation is done. But we don’t want to restart now, first we promote this AD to Domain Controller then we we will go for restart.
However, you can check the box for Restart the destination server automatically if required which means the server will restart and then we can promote the Domain Controller.
Click on Install button once done.
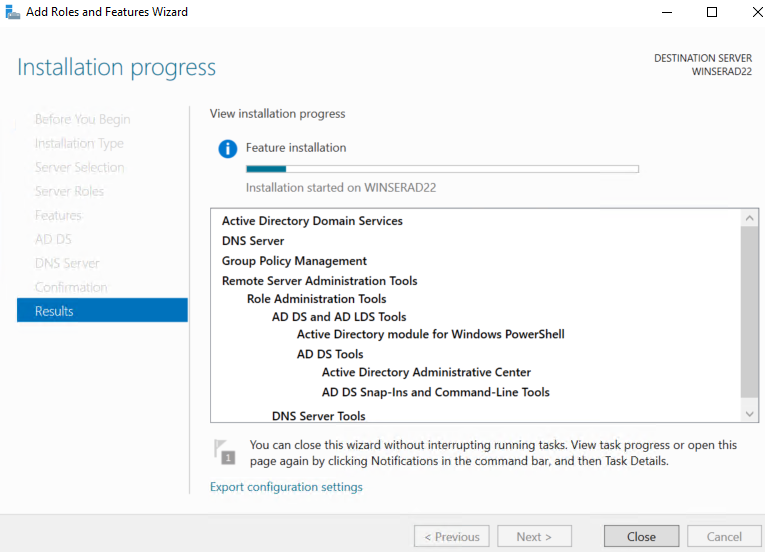
Once the installation process has been started, a progress windows would be showing. So wait for the installation to complete.
Promoting the server to a Domain Controller
Domain Controller: A domain controller (DC) is a pivotal server in Windows networks, managing authentication, authorization, and resource access within a specific domain. As a core element of Active Directory, it verifies user and computer identities, enforces security policies, and handles user management. The DC also hosts a global catalog for faster searches, facilitates data replication for consistency, and enables Single Sign-On (SSO) for seamless access. Group Policy settings are enforced through domain controllers, ensuring standardized network configurations. They’re vital for secure, efficient network management, handling authentication, user data, and resource allocation while supporting trust relationships and DNS resolution.
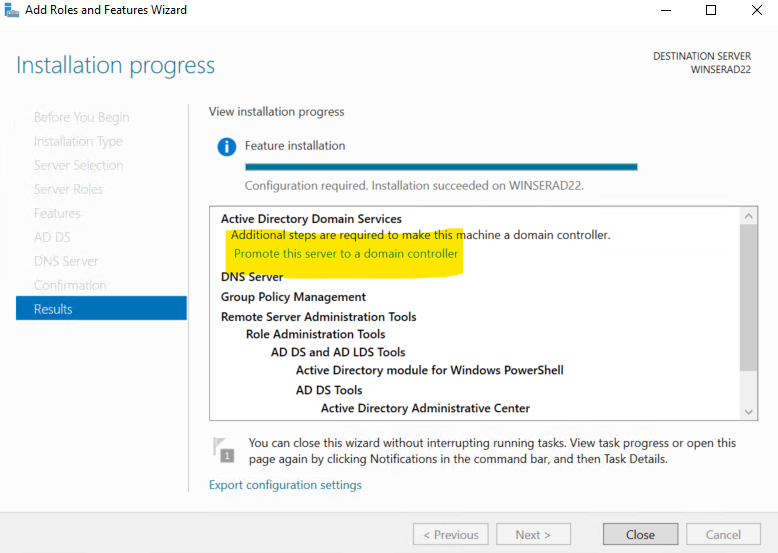
Once the installation is done, it is the time to promote the server to a Domain Controller. Click on the promote this server to a Domain Controller link on the installation completion page.
If you have already closed this windows then click on the Exclamation mark (in yellow color) located at the top right corner.
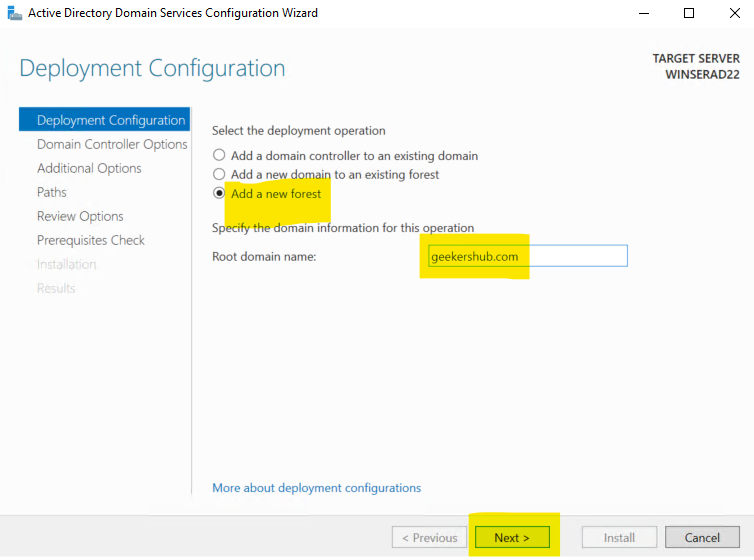
1. On the Deployment Configuration page, choose Add a new forest domain and type a domain name of yours which you going to use (in my case, I am giving as geekershu.com) and click on Next button.
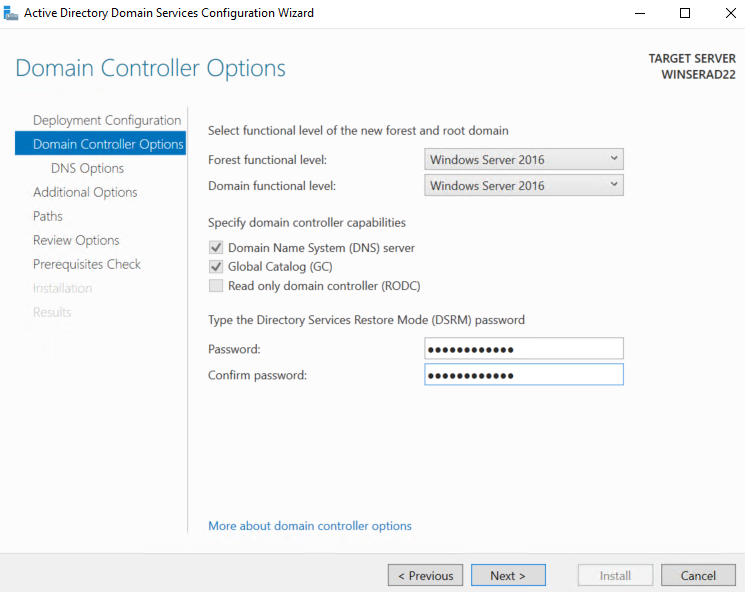
2. In the Domain Controller Options page, enter a password for DSRM which will require in case of Directory Restoration and click Next when done.
3. Click Next button in the DNS Options page. Check the box for Create DNS delegation if required.
DNS delegation in Active Directory involves assigning authority for a subdomain’s DNS management to specific DNS servers. This lets different teams manage their own services within a larger domain while maintaining overall control. You create NS records in the parent domain to point to the DNS servers responsible for the subdomain. These designated servers manage DNS records for the subdomain while the parent domain retains control over the DNS infrastructure.
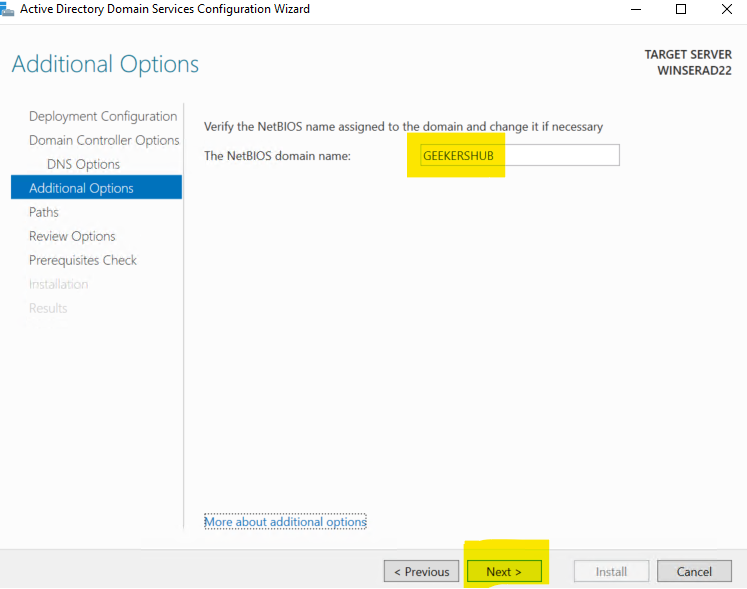
4. In the Additional Options page, verify your NetBIOS domain name and click on Next button if it is correct.
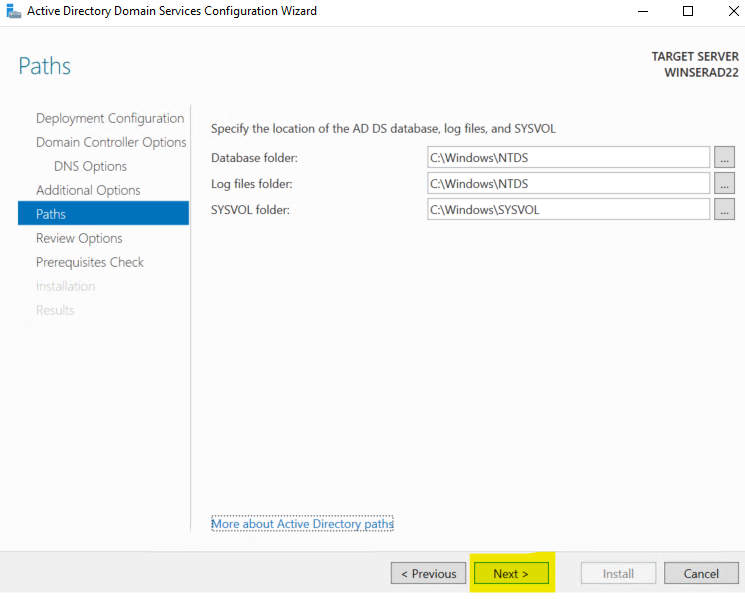
5. In the Paths page, choose the correct folder where you want to store these data. You can choose the default paths too. Here,
Database Folder:
- This is where the actual Active Directory database files are stored.
- The database holds information about directory objects and attributes within the domain.
- It is important to choose a suitable and adequately sized storage location for the database files.
Log Files Folder:
- This is where the actual Active Directory database files are stored.
- The database holds information about directory objects and attributes within the domain.
- It is important to choose a suitable and adequately sized storage location for the database files.
SYSVOL Folder:
- SYSVOL is a shared folder that contains essential elements of a domain’s Group Policy settings and logon scripts.
- It also includes public files that must be available and consistent across all domain controllers.
- SYSVOL is replicated between domain controllers to ensure consistent Group Policy application.
6. In the Review Options, review the settings again and click on Next button.
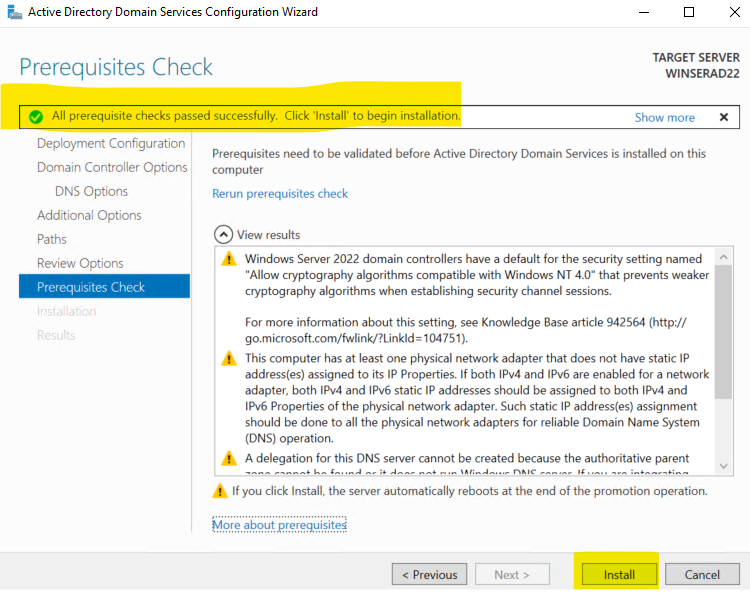
7. Once all the prerequisite checks are passed, it would allow you to promote the Domain Controller, click on Install once done.
8. Once this is done, your server will restart the server automatically. Now while logging into the server (Domain Controller), add your domain name before the user name followed by backslash (‘\’). E.g., geekershub.com\administrator
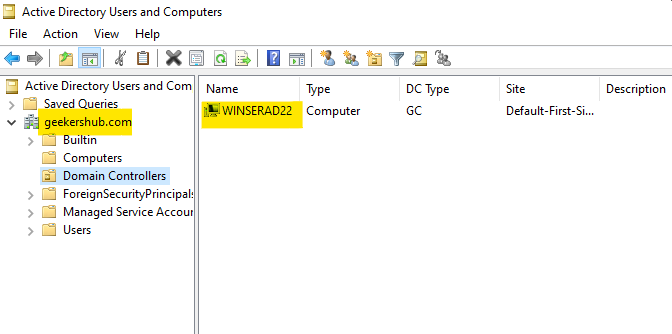
9. After logging into the Domain Controller, verify your server details.
Wrapping Up Installing Active Directory in Windows Server
So, in this article we learn how to install Active Directory and DNS server. We also covered on how to promote the server to a Domain Controller. Installing Active Directory on Windows Server is vital for network management. It centralizes authentication, resource control, and policy enforcement. Begin by selecting suitable hardware and OS. Add Active Directory Domain Services via Server Manager, setting domain details and database paths. Admin credentials are crucial. After installation, monitor replication, verify DNS, and maintain backups.
If you wish learn How to Migrate Windows Server 2012 to 2022, click here.