In this article, we will discuss on How to Migrate Windows Server 2012 to 2022. To do this migration tasks we need to install Windows Server 2022 on the supported hardware device. To download Windows Server 2022 from the Microsoft’s official website, click here. Once the installation is done, join the new AD server to the existing domain and install Active Directory Users and Computers and DNS service. To complete this we will have these two versions of Windows Server:

The domain we are going to use in this is geekershub.com
1. Additional Domain Controller
Log in with an additional domain controller i.e., Windows Server 2022. Assuming you have already added it as an ADC to the existing environment.
2. Change the alternate DNS Server
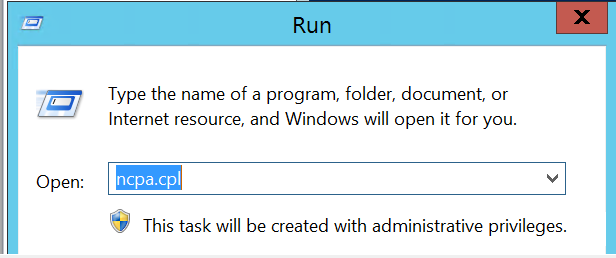
We need to change the alternate DNS Server, so locate to the network properties. Go to run and type ncpa.cpl . You can also use network properties to open this.
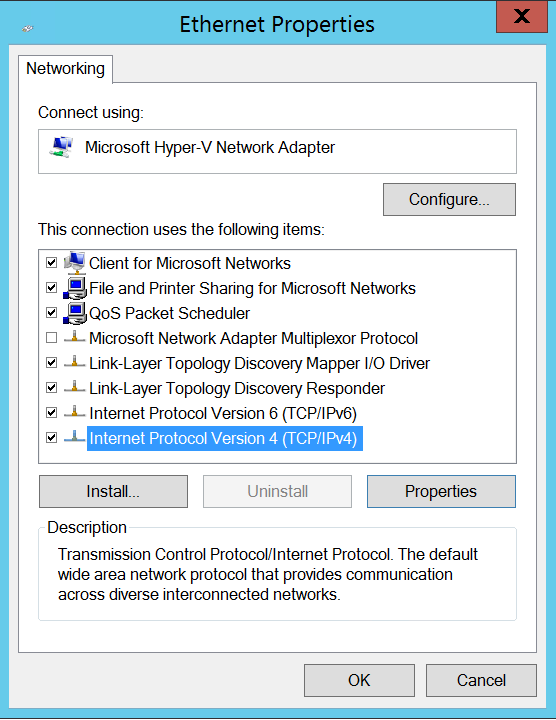
Here, click on Internet Protocol Version (TCP/IPv4) and then click on Properties.
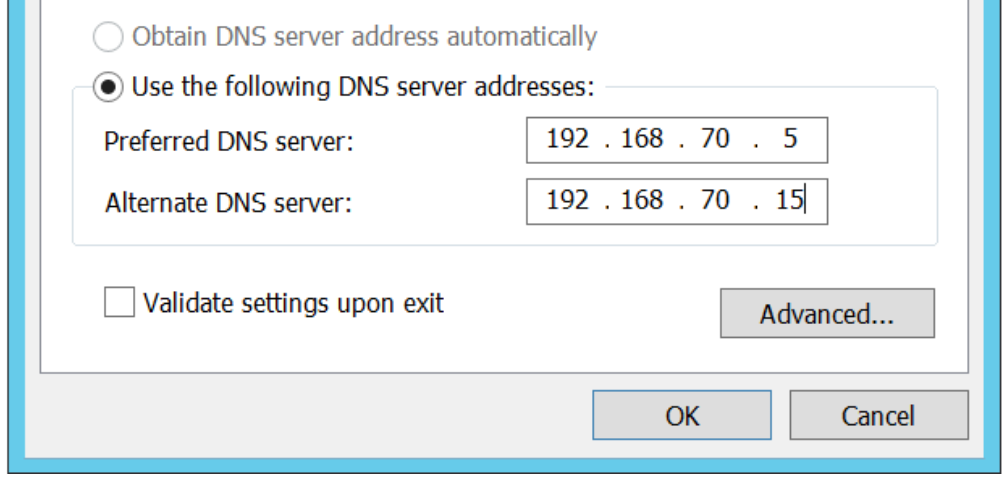
In the opened dialog box add your alternate DNS Server which is at bottom.
3. Check the current FSMO roles
To check the current FSMO roles, there are two ways which are given below:
a. Administrative tools

b. PowerShell
We can also use PowerShell to check FSMO roles in the AD server. Open PowerShell in the AD server and execute these script:
To find the Domain Functional Level, use this command:
Get-ADDomain I fl Name,DomainMode
To find the Forest Functional Level, use this command:
Get-ADForest I fl Name,ForestMode
4. Check the Masters Operations role
- Click Start, click Run, type dsa.msc, and then click OK.
- Right-click the selected Domain Object in the top-left pane, and then click Operations Masters.
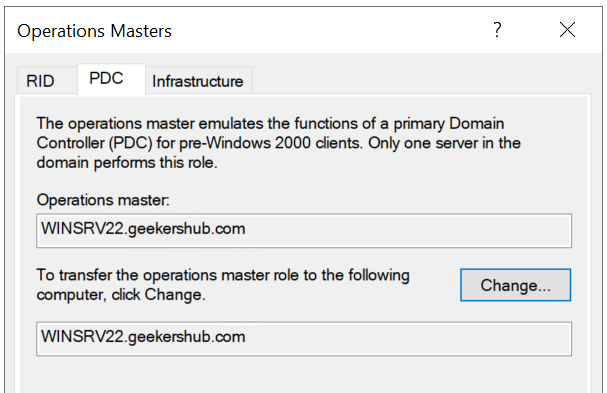
- Click the PDC tab to view the server holding the PDC master role.
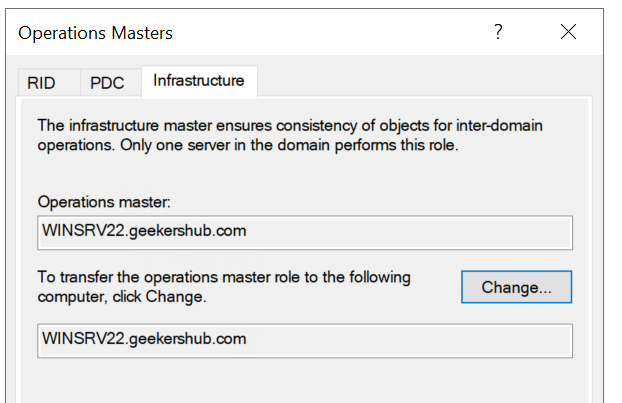
- Click the Infrastructure tab to view the server holding the Infrastructure master role.
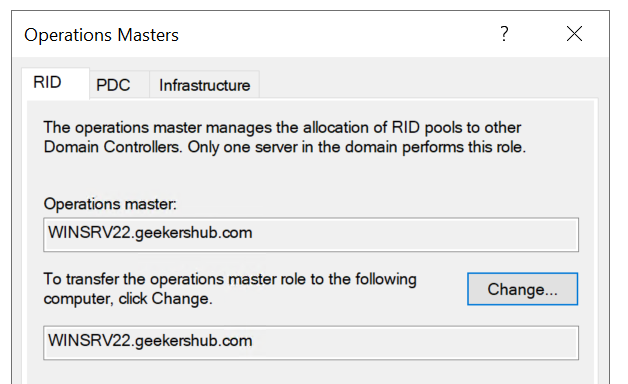
- Click the RID Pool tab to view the server holding the RID master role.
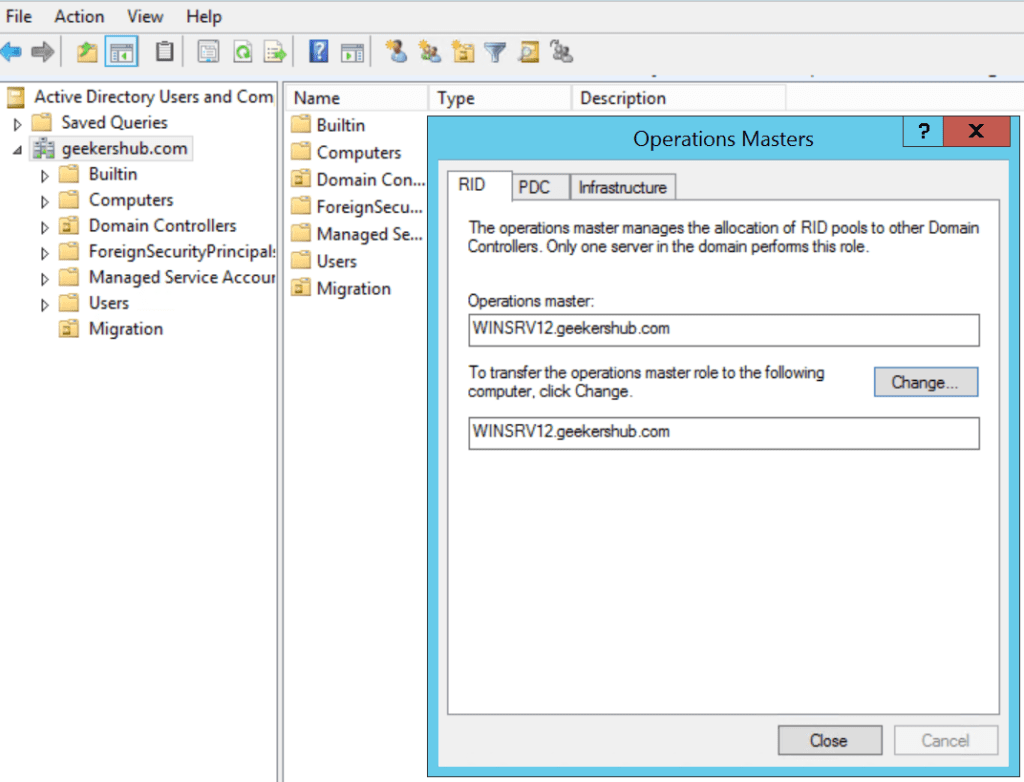
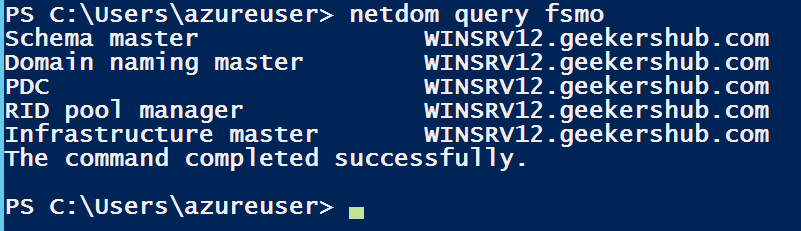
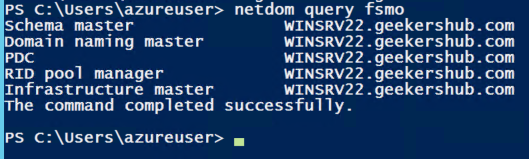
We can also check these roles using PowerShell by executing the netdom query fsmo command. In the below screenshot, we can see as of now all FSMO roles are on WINSRV12 which is old server (2012 R2).
5. Migrating FSMO Roles to Windows Server 2022
Now time to migrate all the FSMO roles to the new AD server.
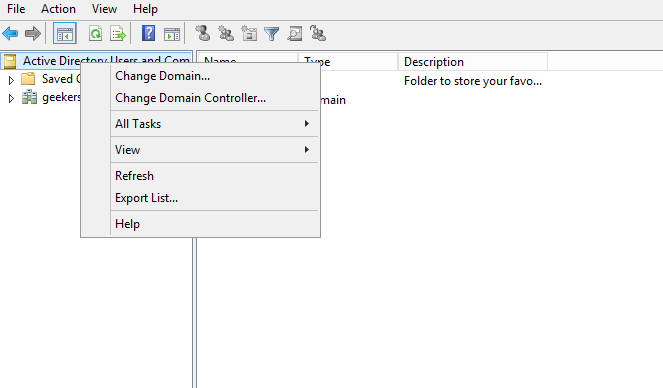
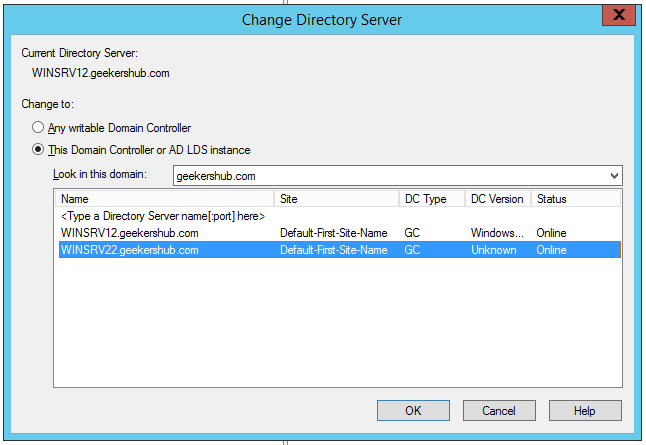
Launch Server Manager and open Active Directory Users and Computers, right-click on the local domain (geekershub.com), and then choose Change Domain Controller to change the domain controller to the new AD Server. We need to change the Domain Controller then we will be able to migrate FSMO roles to the new AD server.
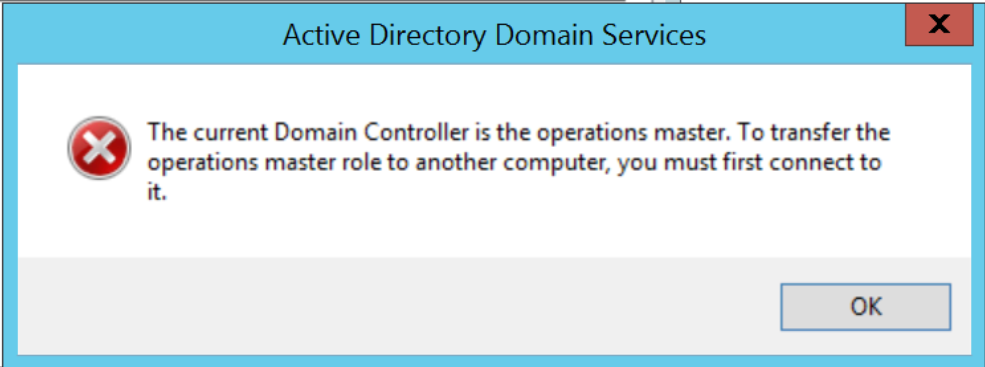
If we haven’t change Domain Controller then we will be getting the error as “The current Domain Controller is the operations master. To transfer the operations master role to another computer, you must first connect to it.” Operations Masters.
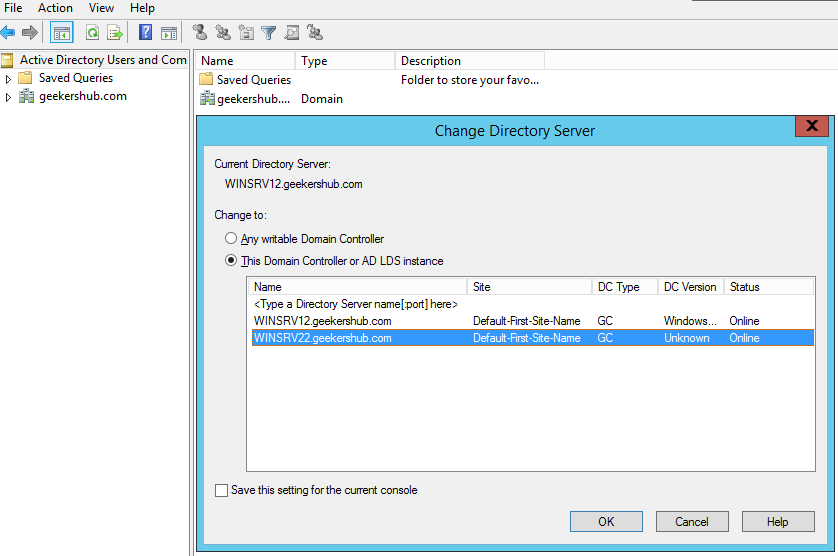
Now, select the AD server where you want to transfer the FSMO roles (WINSRV22 in my case) and click on OK.
6. Change RID, PDC and Infrastructure roles
- Again go to Active Directory Users and Computers.
- Right-click on your Domain Object in the top-left pane, and then click Operations Masters.
- Click the PDC tab to change the server holding the PDC master role and click on Change button, click Yes when prompt to confirm the transfer.
- Click the Infrastructure tab to change the server holding the Infrastructure master role and click on Change button, click Yes when prompt to confirm the transfer.
- Click the RID Pool tab to view the server holding the RID master role and click on Change button, click Yes when prompt to confirm the transfer.
After migrating these roles, it looks like this.
So, in this way we have transferred the RID, PDC and Infrastructure roles to the new AD Server. At this stage if we check the FSMO roles by using the command netdom query fsmo in PowerShell in any of the Domain Controller then it would be showing these roles are on new AD server i.e., WINSRV22 in my case while others two roles (Schema Master and Domain Naming Master) on the old server yet.
7. Change Domain Naming Operations Master role
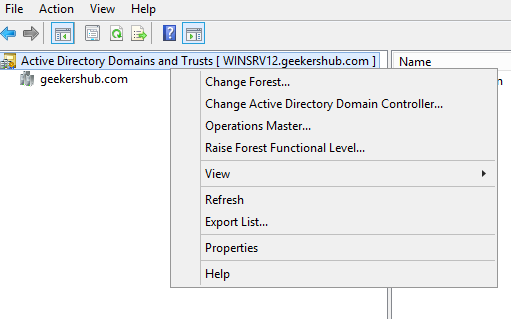
To change Schema Master role, we need to change the Domain Controller here also. To do so open Active Directory Domain and Trusts in Administrative tools.
Right click on the Active Directory Domain and Trusts and choose Change Active Directory Domain Controller.
Now, select the AD server where you want to transfer the Domain naming operations master (WINSRV22 in my case) and click on OK.
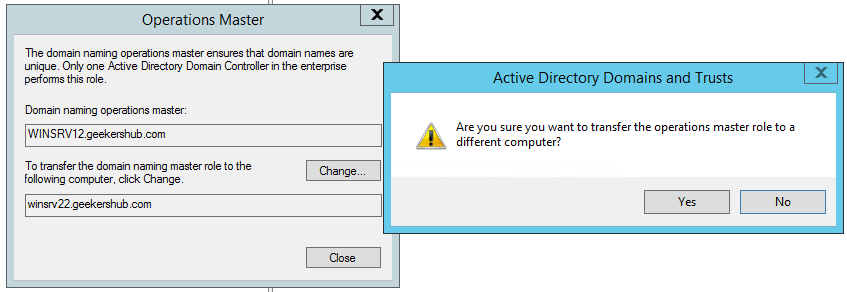
Now, again go back to Active Directory Domain and Trusts and click on Operations Masters.
Click on Change button to change the Domain naming operations master to the new AD server. When prompted to confirm the role transfer, click on Yes.
8. Change Schema Master role
Now, we need to change the Schema Master role and to do so, open PowerShell and type the command regsvr32 schmmgmt.dll to register the Active Directory Schema MMC Snap-in.
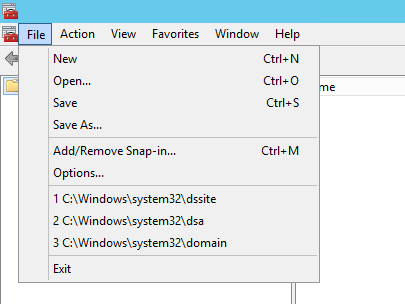
Now go to Run and type mmc.exe , once it opens, click on File at the top left corner and choose Add/Remove Snap-in.
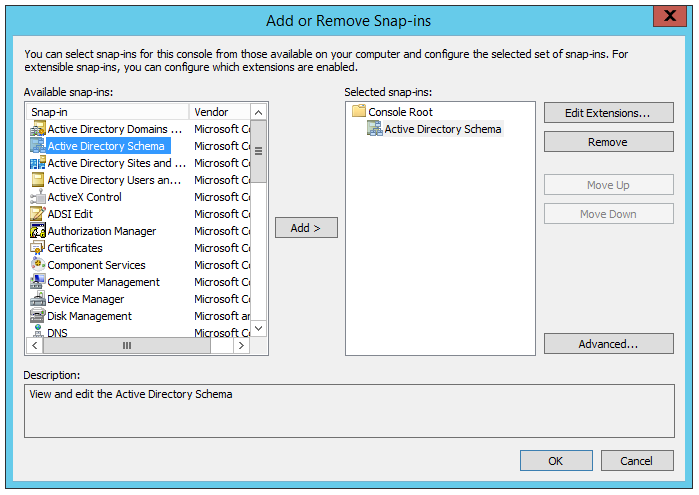
In the Add or Remove Snap-ins, locate to the Active Directory Schema and click on Add button in the middle of the opened windows. Once this is done, click OK to exit this windows.
Now, select the AD server where you want to transfer the Schema Master roles (WINSRV22 in my case) and click on OK when done.
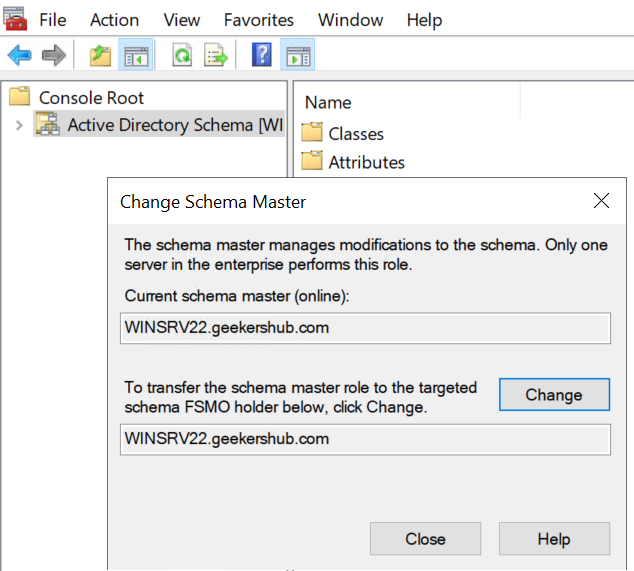
Now, again go back to Console (mmc.exe) and choose Operations Master. In the opened windows, click on Change button to transfer the Schema Master role to the new AD server. Click on Yes when prompted to confirm the role transfer.
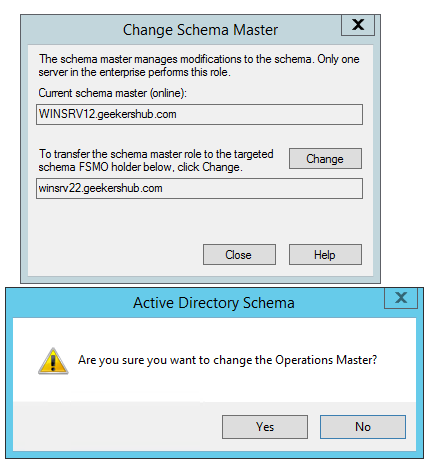
After migrating, Schema Master to the new AD server, it will look like this.
9. Verify the FSMO roles using PowerShell
To verify whether all these roles (Schema master, Domain naming master, PDC, RID pool manager, Infrastructure) have been migrated successfully or not, we will again use the same command i.e., netdom query fsmo. This time all these roles would be showing as WINSRV22 instead of WINSRV12.
10. Change Global Catalog
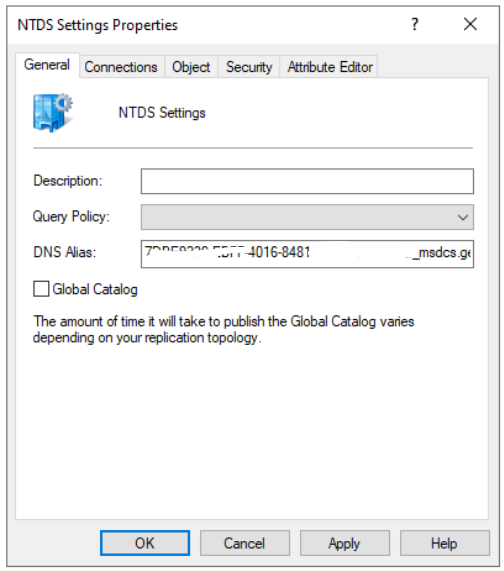
To change the Global catalog, go to Administrative tools and open Active Directory Sites and Services, expand Sites > Default-First-Site-Name > Servers > choose the old AD server i.e., WINSRV12 in my case. Right click on this AD server and choose Properties, here UNCHECK the box for Global Catalog.
Once you change the old AD server from GC to DC, we can check the status in Active Directory Users and Computers >> Domain Controllers.
Global Catalog: The Global Catalog (GC) in Active Directory is a specialized distributed data repository that contains a subset of attributes from all objects in a forest. Active Directory is a directory service developed by Microsoft for Windows domain networks, and it stores information about network resources such as users, groups, computers, and more.
The Global Catalog is used in Forest-Wide Information, Subset of Attributes, Universal Searching, Authentication and Authorization, Replication, Port and Protocol.
Domain Controller: In the context of Active Directory (AD), a Domain Controller (DC) is a server that manages and stores directory information for a specific domain within a Windows network environment. Active Directory is Microsoft’s directory service that provides centralized management of resources such as users, groups, computers, and other network objects in a Windows domain.
11. Pointing to the new AD server
Now, we are almost done with the migration process so before demoting the old server just verify whether all the connected client machines are pointing to the new AD server. We need to swap the old AD server DNS to the new one.
Recommendations: We recommend you to shut down the old AD server for few days to monitor whether everything went correctly. Once you are sure everything is working fine then proceed with the old server removal.
12. Demoting the old AD Server
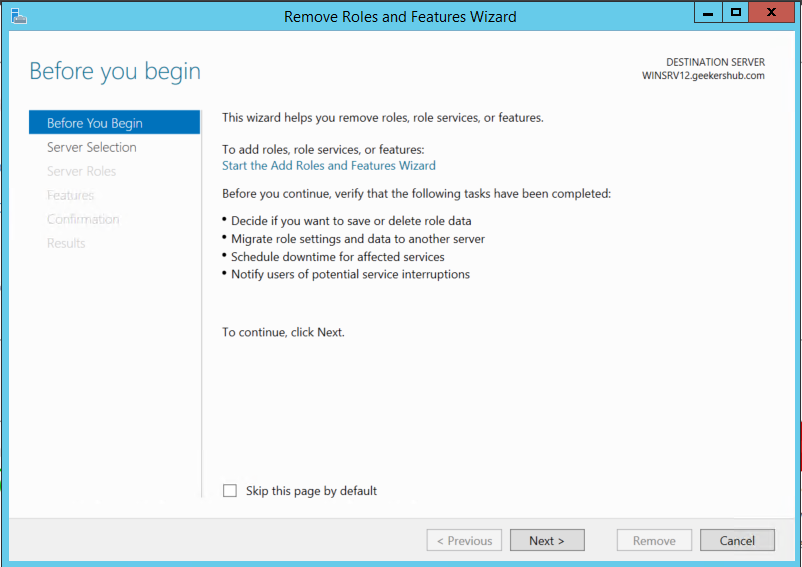
Demoting the old AD server is critical so be careful while you performing this activity. To start the demoting process login into the old AD server. Now, launch Server Manager and click on Manage located at the top right corner and choose Remove Roles and Features.
Once the Remove Roles and Features wizard opens, click on Next to start the removal process.
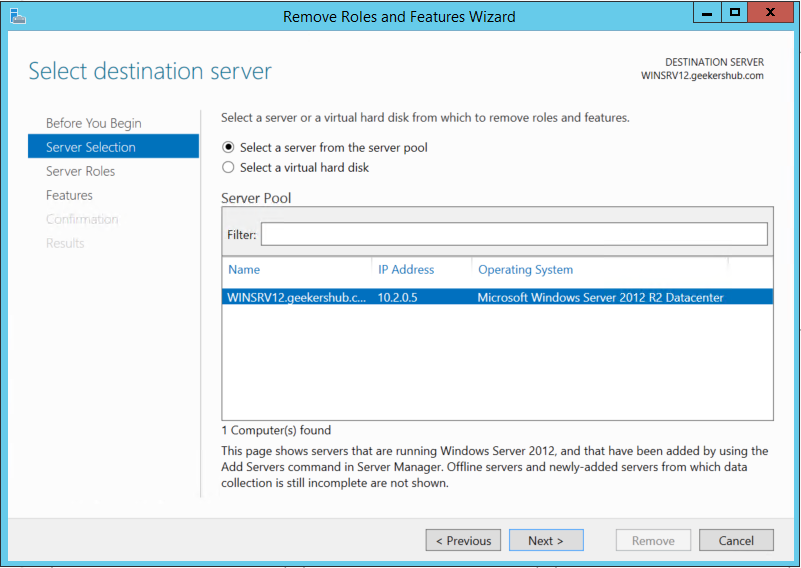
In the next screen, choose the AD server you want to demote (WINSRV12 in my case) and click on Next button.
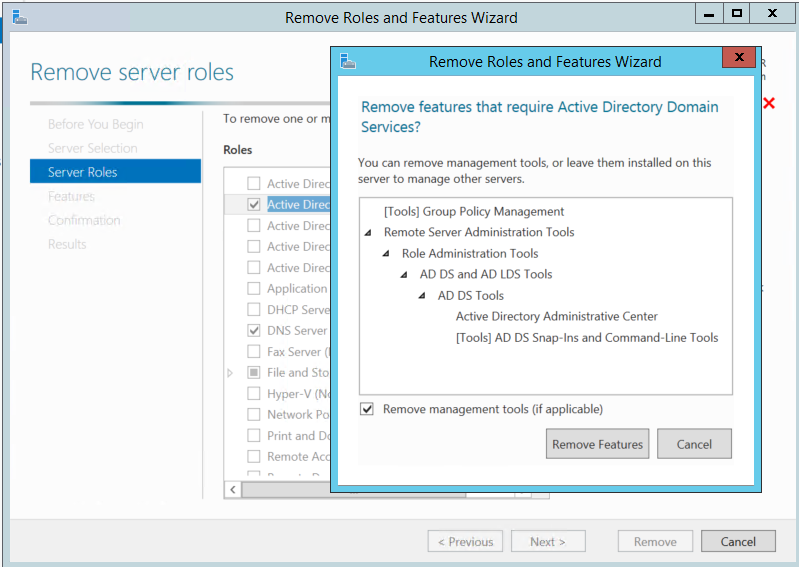
In the next screen, uncheck the box for Active Directory Domain Services. As soon as you uncheck on this, it will prompt to confirm the features removal. Keep the Remove management tools (if applicable) as default.
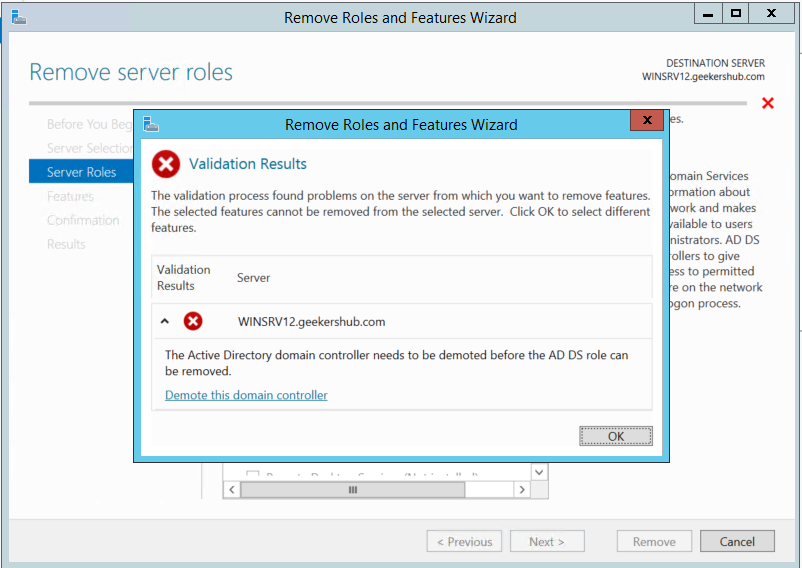
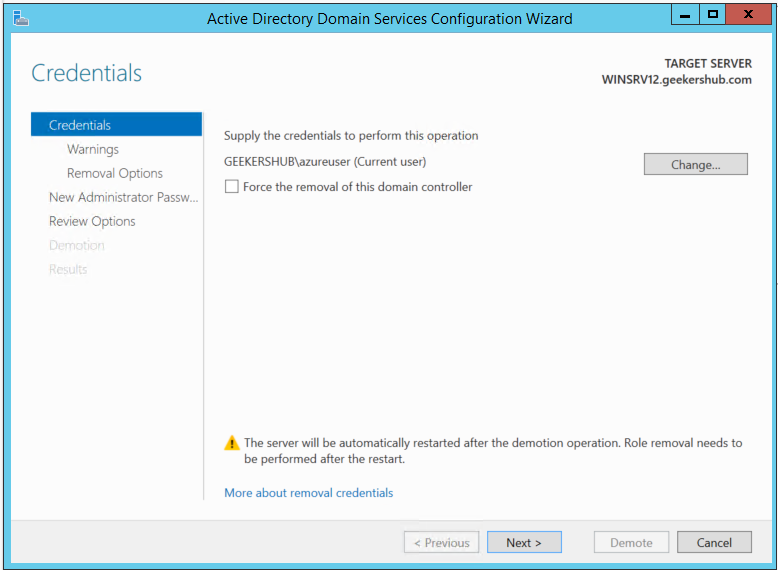
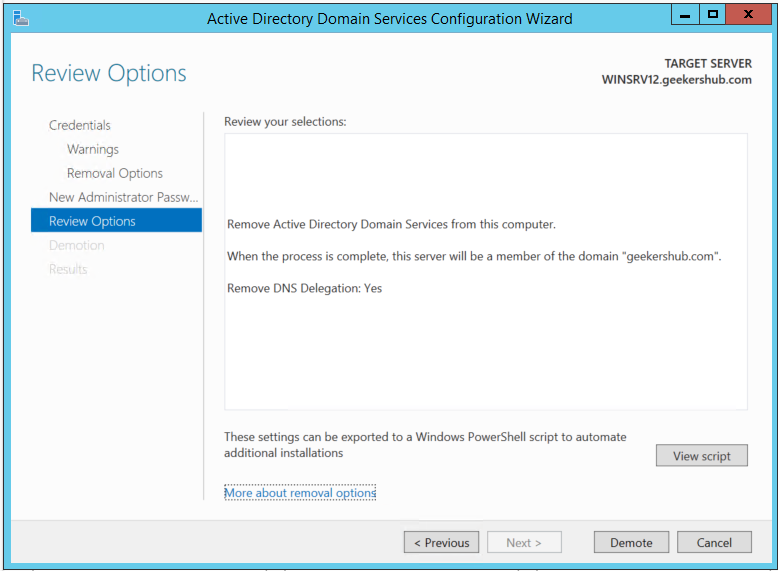
In the next screen, click on Demote this domain controller and supply the AD credentials to proceed.
Here, DO NOT check the checkbox for Force the removal of this domain controller.
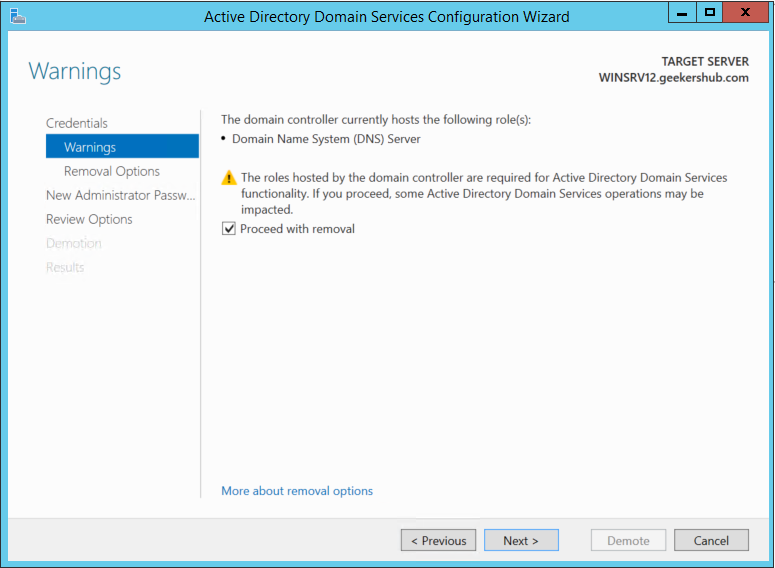
In the next page, click on Next button by checking the box for Proceed with removal.
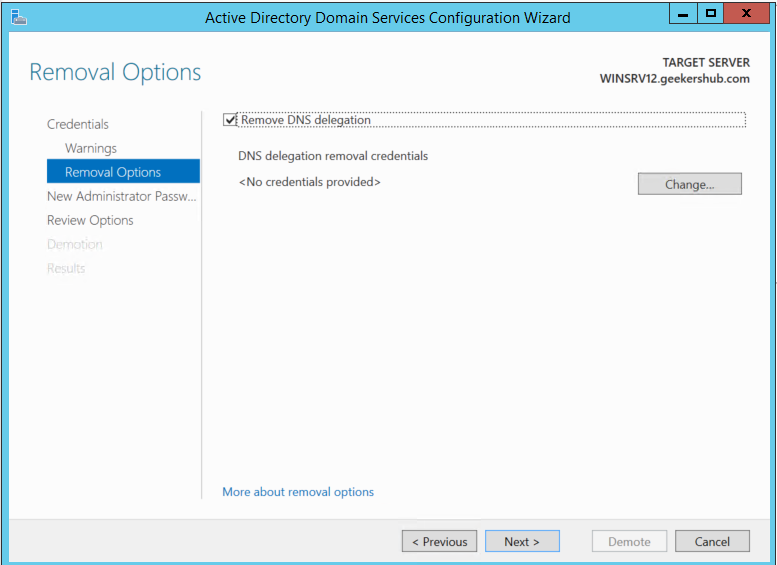
Check the box for Remove DNS delegation and click on Next button.
Enter the password for New Administrator using which you will be logging into the machine later.
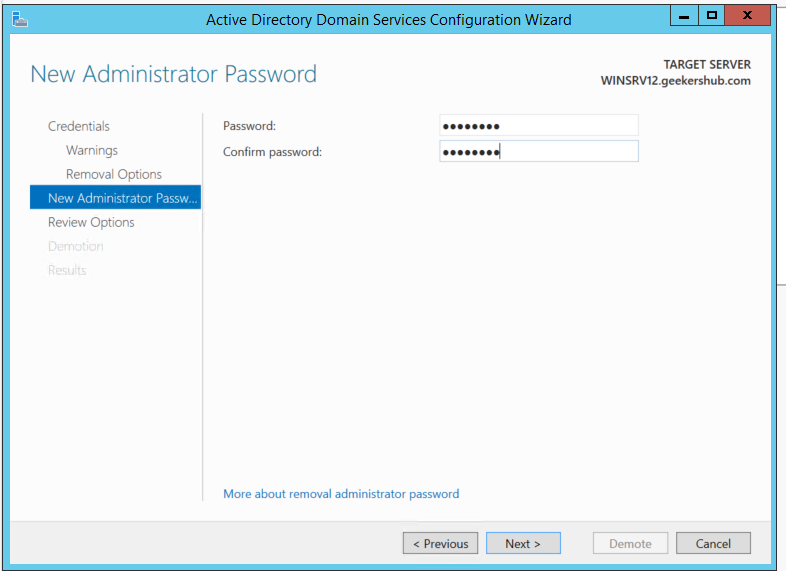
Finally, click on the Demote button to demote the Domain Controller.
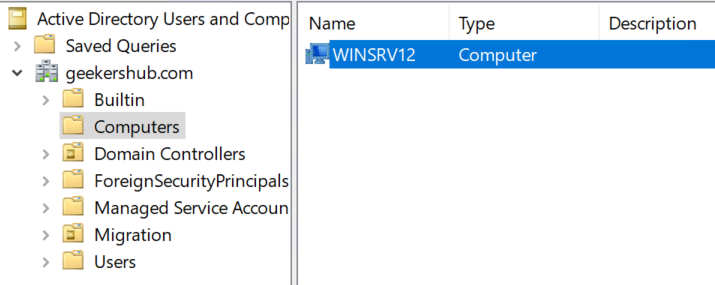
So, in this way we are done with the old AD server removal process. Once the removal process is done we can see the old AD server in Computers lists instead on Domain Controllers. Now it is the time to raise the domain and forest functional level in the new AD server.
13. Raising Domain and Forest functional level in the New AD Server
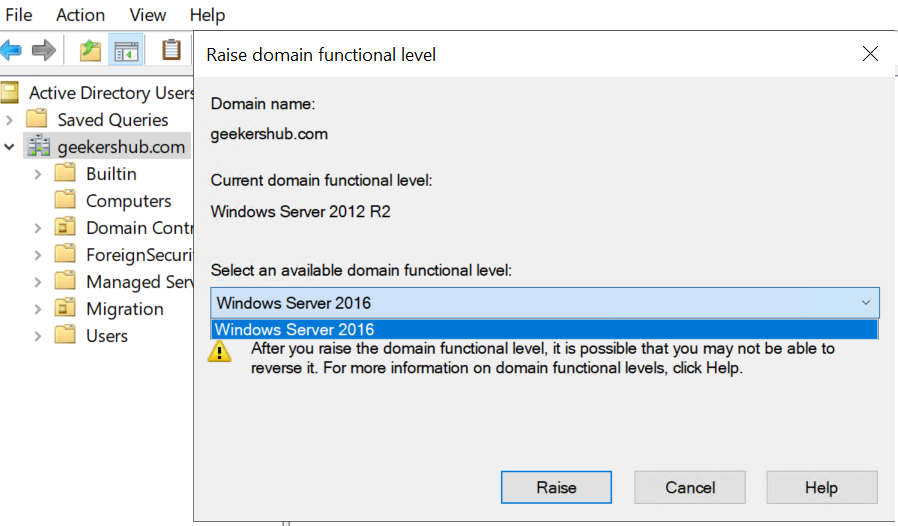
Once we are done with the old AD server removal i.e., Windows Server 2012 R2, we will be able to raise the domain functional level and forest functional level. In the below screenshot we can see the Current domain functional level is showing as Windows Server 2012 R2 and also a drop-down menu is showing to raise the Domain functional level.
As of now we have the highest available Domain and Forest functional level is Windows Server 2016. So we will be able to raise these functional level to this only instead of we having Windows Server 2022.
To raise Domain functional level, go to Administrative tools and choose Active Directory Users and Computers.
Right click on Active Directory Users and Computers in the top left and choose Raise Domain Functional Level.
Click on the Raise button to raise the Domain functional level of the Active Directory.
Click on OK button when prompted to confirm the domain functional level raising.
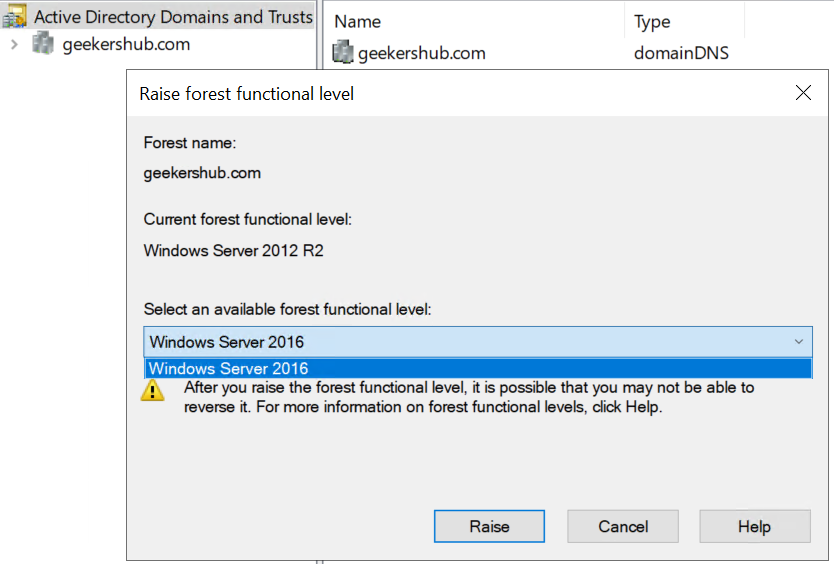
To raise Forest functional level, go to Administrative tools and choose Active Directory Domains and Trusts.
Right click on Active Directory Domains and Trusts in the top left and choose Raise Forest Functional Level.
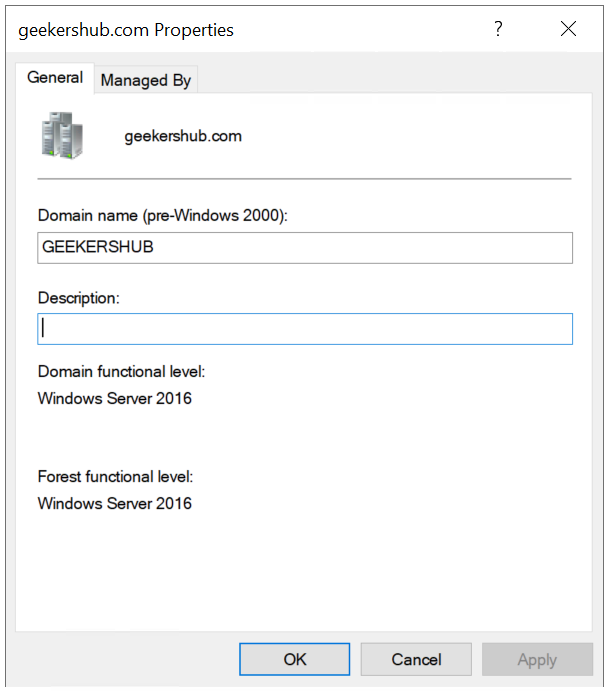
14. Verify the Domain and Forest Functional Level
So, we are done with Domain and Forest Functional Level raising process. Lets verify if it worked properly.
Go to Active Directory Users and Computers, right click on your domain name and choose Properties. Here you will be able to see Domain and Forest functional level. As we can see in the below screenshot, both the levels are showing as Windows Server 2016.
Wrapping up How to Migrate Windows Server 2012 to 2022
So in this article, we have covered how to migrate AD server from Windows Server 2012 R2 to Windows Server 2022 step by step. We also covered how to demote the old AD server and raising the Domain and Forest functional level.
As we all know Windows Server 2012 and Windows Server 2012 R2 both are end of support by October 10, 2023. So upgrade the AD server before it goes to end of support. For more information on this click this URL. If you wish to learn another articles on this website then follow the URL.